
New Video on Needle Felting
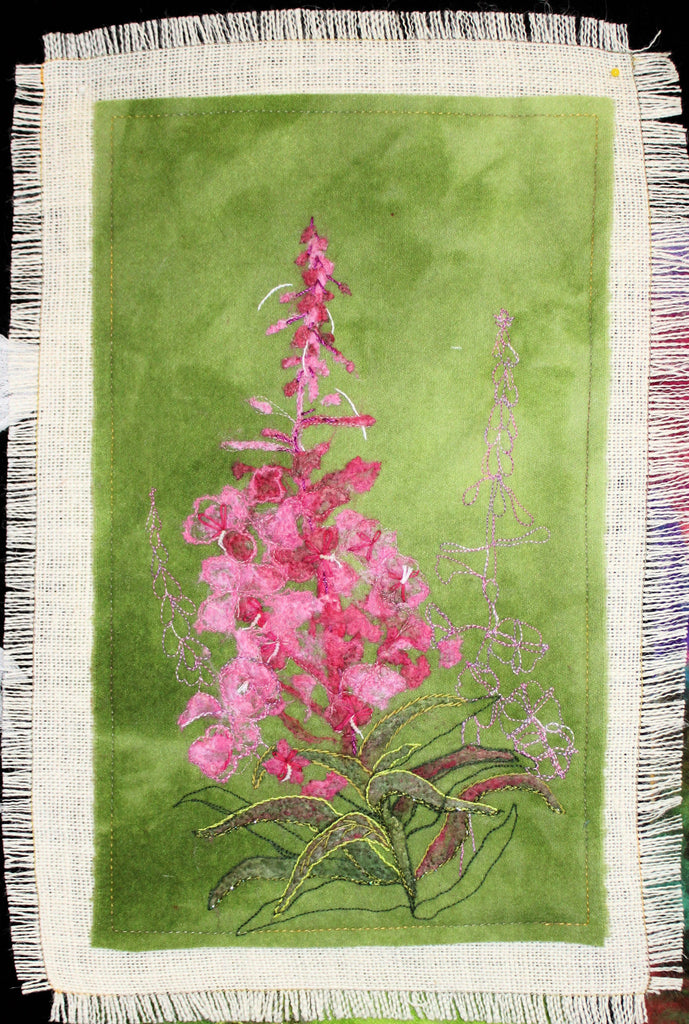
Just recently put together a needle felting project using hand overdyed wool as a base/background and Tussah silk as the fibers that are felted into the project. Felting is a lot like painting, only using fibers. It can create some absolutely wonderful artwork!
 I will be teaching this workshop in Alaska when I go up. I decided that I would include a freezer paper stencil in the pattern because it will make it easier for someone to duplicate this.
It's difficult for some people to look at a photo and then re-create it when there is no way to transfer the line drawing to the opaque background. It's not like you can trace this through the wool... and what would you draw it to the wool with? Hard to do and you don't want to end up with a big old fluffy mess!!!
I am excited about being able to add a stencil to this pattern because it opens up a whole new realm of possibilities for me and for you! I can start including stencils in patterns and because they are not plastic it will not substantially increase the cost of the pattern. Also, you won't end up with a lot of stencils hanging on the pegboard that you only use once but can't bear to toss... or give away.
Anyway.... How do you felt? There are a couple things you need to get started. Some info is helpful...
Start by deciding what base you want. You can actually felt into pretty much any fabric so try different fabrics to see what they do. Burlap looks great, so does linen, cotton, silk, felted wool, chiffon.
Try a scrap. You may need to put a stabilizer under the foundation fabric so that it doesn't warp and stretch and develop permanent holes. Remember, the needles are barbed so will "cut" the fabric as it shoves the roving or tussah into the base.
Tussah silk has a wonderful sheen to it. The threads/fibers that make up the hankie are very sheer so you may want to use a nail file or buffer and rub it on your fingers to eliminate any little bits of you that want to hang onto the silk fibers. Make sure your nails are smooth, too, and your cuticles.
Wool Roving is a little more coarse so is easier to work with. It doesn't cling to you as easily. You can get different types of wool and some is curly, some is not, so explore and try out different types to see what you love to work with. Remember, different types of designs will use different fibers in assorted places.
I use hand dyed fibers and let the other person get all messy. However, you can purchase undyed roving or silk hankies and use Dyna Flow or Tsukineko All Purpose Inks to dye them. Be aware that the Inks must be heat set to become permanent. To do so simply turn the oven on to 325 degrees and bring it up to that temperature. Put your roving/silk on a cookie sheet covered with parchment paper, put the sheet into the oven, turn off the oven, let it "bake" for about 1/2 hour. By then the oven will have cooled and your product should be set. If not, do it again. Some ovens (like mine) cool down very quickly. You can also let your wool/silk dry naturally and throw it in the dryer to get warm. I recommend putting it into a lingerie bag or it will all end up in the lint trap!
I have a Baby Lock embellisher which is a machine that does needle felting. I love it. I also use Needle felting tools that you use by hand. Clover has some wonderful options, from using a large felting tool with 5 needles, to a pen with 3 and even smaller. You can use a single needle to create vines and detailing.
Here is a short video I did on felting:
https://www.youtube.com/embed/VFmJb1o93uo
It shows the tools (briefly) and gives you some hints. It's the first video I've done in years so be kind!! I'll get better.
Quick Tips:
If you are needle felting using a hand tool make sure you do not twist the needles or go in at a weird angle. Straight up and down motion works best as your needles will break if you are not careful. They look sturdy but are long and thin so can snap.
Don't use the needles to drag fibers where you want them to go... and when you put the fibers in place remember they are going to be pushed into the fabric, not stay on the surface as applique. You will lose about half of the volume during the felting process. Try this and you will see what I am talking about.
You will become hooked in no time. It is an amazingly creative process. And this is just the tip of the iceberg.
I have a lot of videos in mind to help you learn how to do things and make your projects easier to do, more fun, and lots of tips will be included. I am very, very excited to get started on this. Which will start happening when I return to Texas. If there is something you really want to learn send me a post and I'll include it in the list of upcoming videos.
Stay tuned for more to come.... :)